本系列的前面两篇文章(见相关文章)讲解了如何将使用SVG的path数据以及对特定部分的path元素采用简单的动画效果。本文将更深入的讲解动画效果。
注:这篇文章讲解如何通过path的属性设置路径绘制效果。
Romain Guy(一个安卓开发者) 写过关于tracing paths的博客,它使用SVG path来定义路径,通过调整虚线的参数来造成正在绘制路径的效果。因为VectorDrawable也支持SVG的path数据,是不是可以在VectorDrawable使用同样的技术呢?当然可以,只是我们并不需要这样做,可以通过VectorDrawable中<path>元素的一些属性来达到同样的效果。
绘制路径(path)这种方式并不适用于目前我们想绘制的android机器人,因为这个安卓的logo包含了需要填充的区域,而不仅仅是线条。我们先从简单的入手,定义一个path性质的VectorDrawable。这个VectorDrawable的path数据是基于我从这里获取的一个星形SVG图片,这是一个相对简单的几何图形,它有足够的长度去演示我们想要达到的效果。当然,你也完全可以使用Romain在勾勒美国地图时所用到的技术。
<vector xmlns:android="https://schemas.android.com/apk/res/android"
    android:viewportHeight="500"
    android:viewportWidth="500"
    android:width="500px"
    android:height="500px">
    <group android:scaleX="5.0" android:scaleY="5.0">
        <path
            android:name="star"
            android:strokeColor="@color/sa_green"
            android:strokeWidth="2"
            android:pathData="M 50.0,90.0 L 82.9193546357,27.2774101308 L 12.5993502926,35.8158045183 L 59.5726265715,88.837672697 L 76.5249063296,20.0595700732 L 10.2916450361,45.1785327898 L 68.5889268818,85.4182410261 L 68.5889268818,14.5817589739 L 10.2916450361,54.8214672102 L 76.5249063296,79.9404299268 L 59.5726265715,11.162327303 L 12.5993502926,64.1841954817 L 82.9193546357,72.7225898692 L 50.0,10.0 L 17.0806453643,72.7225898692 L 87.4006497074,64.1841954817 L 40.4273734285,11.162327303 L 23.4750936704,79.9404299268 L 89.7083549639,54.8214672102 L 31.4110731182,14.5817589739 L 31.4110731182,85.4182410261 L 89.7083549639,45.1785327898 L 23.4750936704,20.0595700732 L 40.4273734285,88.837672697 L 87.4006497074,35.8158045183 L 17.0806453643,27.2774101308 L 50.0,90.0Z" />
    </group>
</vector>
矢量图形资源中,只需一个简单的path以及相应的path名称,这个名称方便我们把它应用到AnimatedVectorDrawable中。而AnimatedVectorDrawable自身也非常简单,将path animator应用到指定了属性名的path就可以了。
<?xml version="1.0" encoding="utf-8"?>
<animated-vector xmlns:android="https://schemas.android.com/apk/res/android"
    android:drawable="@drawable/star">

    <target
        android:animation="@animator/path"
        android:name="star" />
</animated-vector>
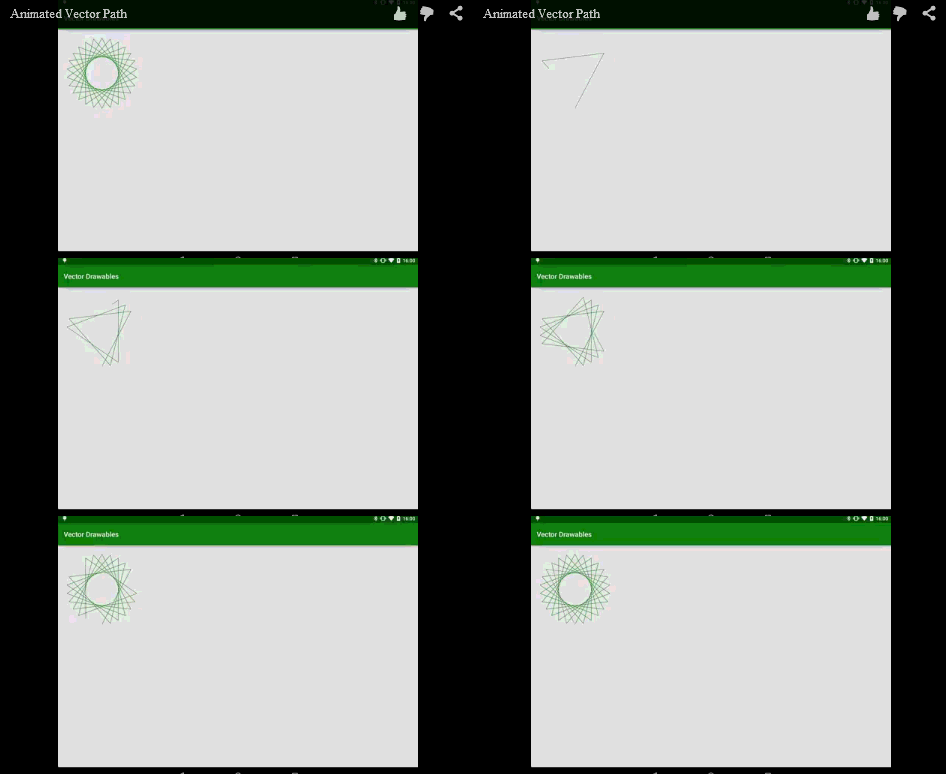
这里有趣的是控制VectorDrawable中<path>元素trimPathEnd属性的Object Animator。这个属性决定绘制多少path,其余的部分将不被绘制,其取值区间是0到1.所以要实现路径的动态绘制效果,我们只需动画变换trimPathEnd属性,这样就能达到和Romain的例子中的效果。
这里的属性动画很简单:
<?xml version="1.0" encoding="utf-8"?>
<objectAnimator xmlns:android="https://schemas.android.com/apk/res/android"
    android:propertyName="trimPathEnd"
    android:valueFrom="0"
    android:valueTo="1"
    android:duration="5000"
    android:valueType="floatType"
    android:interpolator="@android:interpolator/linear">
</objectAnimator>
接下来,我们只需将AnimatedVectorDrawable放到布局的ImageView中就可以了。
比起Romain的实现方式,我们少写了很多代码,实际上我们连一行java代码都没写就实现了如下效果:

这篇文章就此结束,下篇文章我们将更深入的了解如何操作path数据本身。
本文的代码在这里。
ps 翻译完这篇文章,我发现自己对AnimatedVectorDrawable有个误解原来animated-vector开头的xml才是AnimatedVectorDrawable本身。
英文原文:VectorDrawables – Part 3
转载请注明出处 https://jcodecraeer.com/a/anzhuokaifa/androidkaifa/2015/0301/2515.html


